Marble surface becomes dull with whitish spots due to acid etching. It is one of the most common types of damage due to the reaction of acid with the marble. To treat this damage requires professional treatments. The key to distinguishing between etch and stain is using the right specialized product to repolish the marble surface. In this article, let us understand how to buff out a minor marble etch mark.
What is an etch mark?
Marble is primarily made of calcium carbonate, and when it comes into contact with any acidic liquids such as citrus, vinegar, wine, or any acidic cleaners, a chemical reaction occurs that eats away the top layer of the stone.
- The Look: The etch mark appears as a lighter, dull, and rough spot on the surface of the marble, and it is physical damage, not a stain.
- The Fix: Etch marks cannot be cleaned with a damped cloth, but they can be fixed using a specialized product, i.e., marble polishing powder or etch remover, to gently buff and repolish the micro layer of stone. This process involves sanding and polishing on a microscopic level.
Important Caveat: This is for Polished Marble Only
The DIY method is most effective on polished white, light-colored marbles like Calacatta and Carrara. It may not work on dark shades of marble like dark green, black, and honed marble finishes. They need a different repair process.
The 4-Step DIY Etch Removal Process
This repair process needs specialized materials, but the methods are easy to follow:
Materials You Will Need
- Specialized Marble Etch Remover/Polishing Powder: Must be specifically labeled for marble.
- Soft Microfiber Cloths: Several clean cloths.
- Spray Bottle with Water: To create the polishing paste.
- pH-Neutral Stone Cleaner: To clean the area before and after.
Step 1: Clean and Prepare the Area
First, ensure the surface is completely free of dirt, oil, or residue.
- Always use pH-neutral cleaner to clean the etched spot and the surrounding area of marble.
- Rinse thoroughly with clean water and dry the area with a soft, clean cloth. Do not proceed with further processing till the marble is dried completely.
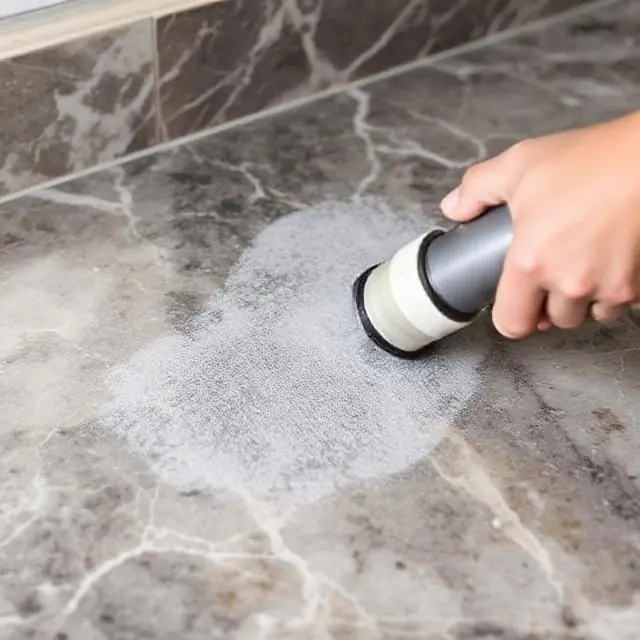
Step 2: Create the Polishing Paste
This step is crucial for success. You want a thick, gritty paste, not a runny liquid.
- Sprinkle some small amount of polished powder directly on the etch mark.
- Use a spray bottle to lightly mist the powder with water to create a thick and gritty paste.
- Tip: if the paste is too wet, then add some more powder to dry it and mist very lightly with water.
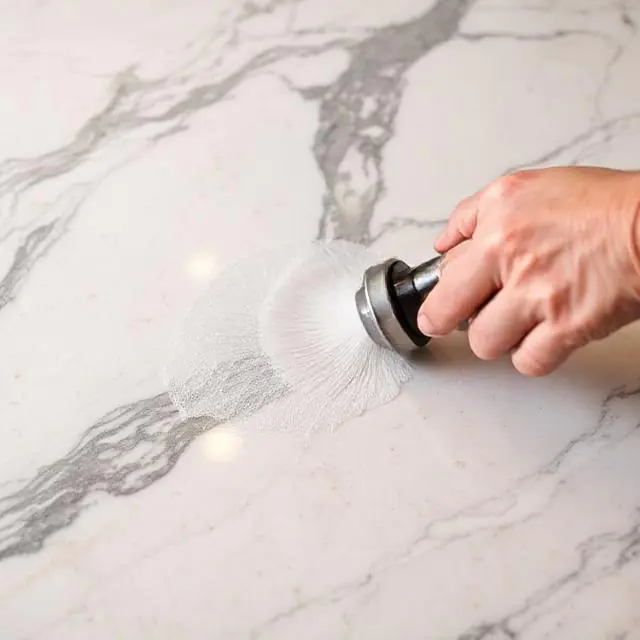
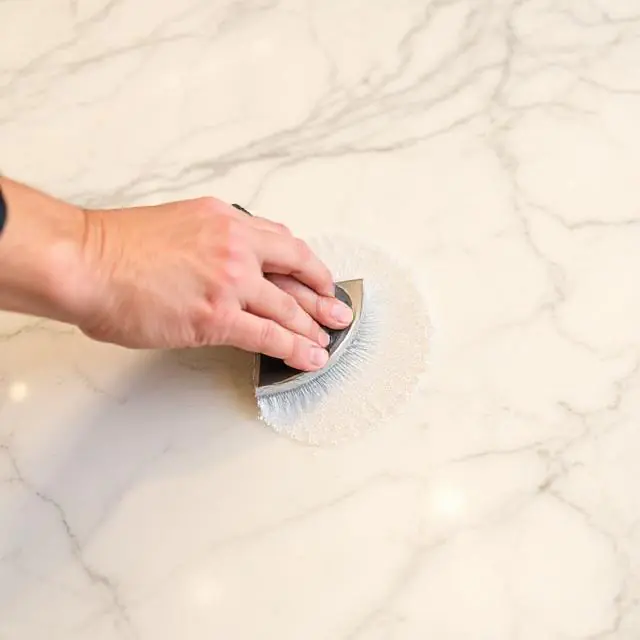
Step 3: Buff and Re-Polish (The Elbow Grease Step)
This is where the magic happens, but it requires patience and effort.
- Use of a damp cloth on the area to clean the surface.
- Use a steady pressure and rub the paste over the etch mark in circular motions.
- Work with the paste for 30 to 60 seconds at a time, and the friction from the powder will repolish the dull spots.
- Crucial: Never allow the paste to dry completely; in case it dries, then add a little bit of water and start the process again.
Step 4: Inspect, Clean, and Repeat
After your first application:
- Wipe off all the paste and clean the surface with a damp cloth.
- Now dry the area with a clean cloth and inspect the mark from different angles.
- If the dullness is still visible, then repeat the process a second and third time with fresh powder. It is better to do vigorous applications than one long aggressive one.
- Once the etch vanishes and the shine is restored, clean the area again with a pH-neutral solution.
Conclusion: A Quick Fix, Not a Permanent Shield
DIY spot repair is a fantastic way to keep minor etching from ruining the look of your expensive stone. However, it’s vital to remember that you are mechanically removing and re-polishing a microscopic layer of the stone each time.
For maximum protection, always combine this spot-repair technique with preventative measures: seal your marble regularly to prevent stains, and use coasters and cutting boards religiously to prevent future acid attacks.
Frequently Asked Questions (FAQs)
Q1: Is an etch mark the same as a stain?
A: No. An etch is physical damage where the acid has dissolved the stone (it looks dull/white). A stain is a substance that has soaked into the porous stone (it looks darker, like oil or wine). They require different treatments (poultices for stains, polishing powder for etches).
Q2: Can I use baking soda or toothpaste to remove an etch mark?
A: Do not use baking soda or toothpaste. While they are mild abrasives, they are not formulated for marble. They can damage the delicate sealant layer, leave their own marks, and may not fully restore the stone’s original luster. Use a product made specifically for marble etching.
Q3: How do I know when I need to call a professional?
A: You need a professional if:
- The etch mark is very deep (you can clearly feel a significant depression with your fingernail).
- The etching covers a large, widespread area (a whole countertop section).
- You have tried the DIY method 2-3 times and the dullness remains.
- Your marble is a honed finish (matte) and you don’t know the exact process to restore it.