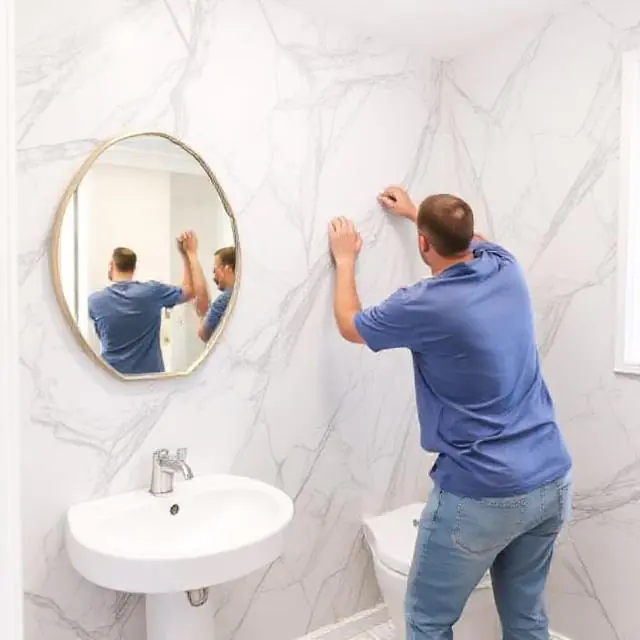
Installing marble in a precise way is a technique, and it can be done by expertise. In order to install the marble, one must know the precise cutting, proper planning, and awareness of layouts and designs. Although the installation of marble is done by experts, there are still some common mistakes to avoid when installing marble on bathroom walls. In this guide, we will walk you through the mistakes to avoid while installing the marble on bathroom walls.
1. Skipping Proper Surface Preparation and Waterproofing
It is the most critical and commonly made mistake. A marble looks elegant and durable only if it has a good foundation beneath it.
- The Mistake: Installing marble directly on drywall or substrate that is not perfectly clean, leveled, and waterproofed.
- The Problem: Marble is porous in nature; it can easily absorb water and weaken the adhesive bond. An unleveled wall will result in tile lippage.
- The Solution:
- Ensure it is structurally sound, leveled, and clean.
- Apply a top-tier waterproofing membrane to shower wall and floor. The corners and covering all seams and screw heads beyond the area the marble will cover.
2. Using the Wrong Adhesive and Grout
Marble reacts poorly with standard tiling materials.
- The Mistake: Use standard gray or thin-set mortar.
- The Problem: Gray thin-set can bleed through the porous. It may cause permanent discoloration or a muddy appearance.
- The Solution:
- Always use premium quality white polymer thin-set mortar specifically recommended for natural stone and wet applications.
- For grouting, choose non-sanded grout for polishing marble to prevent scratches on the finish. A fine, smooth-sanded grout for tile and joint size is required. Use a color that complements the marble’s natural tone.
3. Ignoring the Importance of Sealing (Pre- and Post-Grout)
Sealing is non-negotiable for marble in a bathroom.
- The Mistake: If the marble is not sealed or only sealing is done after the grout.
- The Problem: Marble’s porosity makes it highly susceptible to stains and etching from soap and hard water. It delays the initial seal and allows the stone to absorb the contaminants during the installation process.
- The Solution:
- Pre-seal: The marble, with premium quality, a natural sealant, must be done before installation. This helps to prevent the absorption of moisture and grout from staining the stone.
- Post-seal: The entire surface, including the marble and grout lines, must be fully cured and resealed regularly, typically every 6 to 8 months.
4. Failing to Dry-Layout and Color-Match
Marble has natural variation that must be managed visually.
- The Mistake: Tiling straight from the box is a big mistake if it is done without arranging the pieces.
- The Problem: The natural stone has veins and color variations. Installing the tiles randomly can result in jarring transitions, destroying the aesthetic flow.
- The Solution: Dry-lay marble tiles to create your preferred pattern. Mixing pieces from different boxes and carefully matching the veins and color ensures a flowing and cohesive design. Especially for bookmatched installation.
5. Skimping on Adhesive Coverage (Back-Butter)
Proper bonding ensures the tiles stay put.
- The Mistake: Applying only adhesive to the wall using the trowel’s teeth.
- The Problem: This often results in less than the required 95% mortar coverage, creating air pockets beneath the tile. In wet areas, these voids can trap moisture, weaken the bond, and lead to tile cracking or lifting (popping off the wall).
- The Solution: Back-butter: Every marble, especially large tiles, by applying a thin, flat layer of thin set to the back of the tile before pressing it on the wall.
- every marble tile—especially large-format tiles—by applying a thin, flat layer of thin-set to the back of the tile before pressing it into the troweled thin-set on the wall. This ensures near-complete contact and a strong, durable bond.
Conclusion: Patience is the Key to Marble Mastery
Installing marble on bathroom walls is an investment that requires meticulous attention to detail. The most significant mistakes are made before the first tile is even set, particularly with waterproofing and surface preparation. By taking the time to use the correct materials (white, polymer-modified thin-set and natural stone sealer) and adhering to professional standards like dry-laying and back-buttering, you can successfully achieve the luxurious, timeless marble bathroom you envision. For such a high-value material, if you lack experience, hiring a qualified, experienced stone setter is often the best insurance against costly errors.
Frequently Asked Questions (FAQs) on Marble Wall Installation
Q: Do I need to waterproof the walls before installing marble?
A: Absolutely yes. Marble is porous. A high-quality liquid-applied waterproofing membrane must be applied over the cement board substrate in all wet areas (showers, tub surrounds) to prevent water intrusion and mold growth.
Q: Why should I use white thin-set?
A: White thin-set is crucial, especially for light-colored marbles (like Carrara or Calacatta). Standard gray thin-set can show through the porous stone, giving it a dark, muddy, or discolored appearance.
Q: How often should I seal my marble walls?
A: In a high-moisture bathroom, natural stone sealer should be reapplied every 6 to 12 months to maintain maximum stain protection. A simple test: If water no longer beads on the surface, it’s time to re-seal.
Q: Can I use my regular acidic cleaner on my new marble?
A: No, never. Acids (like vinegar, lemon, or many common bathroom cleaners) will instantly etch the marble’s surface, leaving permanent dull spots. Use only pH-neutral, stone-safe cleaners.
Q: What is “lippage,” and how do I prevent it?
A: Lippage is a condition where the edges of adjacent tiles are not flush, creating an uneven surface. Prevent it by ensuring your wall substrate is perfectly flat before tiling and using a tile leveling system during installation.